Often it is necessary to install a new font to view a
document or web page properly. For older Windows operating
systems, there are font installation instructions on the
Microsoft web site.
Downloading a Font: To download a font,
typically you need to "right click" on the font link and
select "Save Target As ...". You will then be presented with
a dialogue box and the option to save the font to your hard
drive. Select a folder where you would like to save the
font. For example, you might want to create a folder on the
Local Disk (C:) drive with the folder name downloads
(c:\downloads). So, when you are presented with the option
to save the font to your hard drive, select the folder
c:\downloads and click OK.
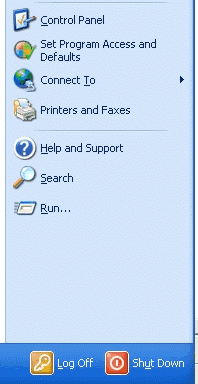
Font Folder: Click on the Start button and
click on the Control Panel Icon. The
Font folder will then display.

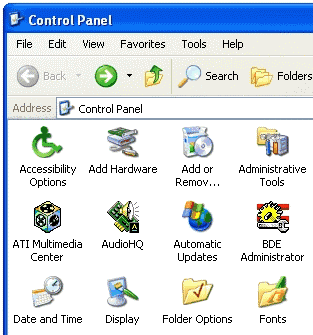
Font Installation: Click on the Fonts folder in the Control Panel display. The
Font folder's contents will then display.

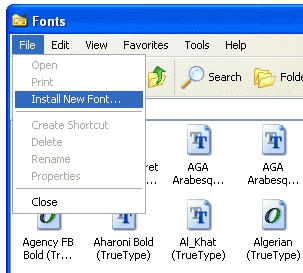
Install New Font: With the Font folder open, click on
File and a drop-down menu will display with the option
"Install New Font". Click on the Install New Font option.
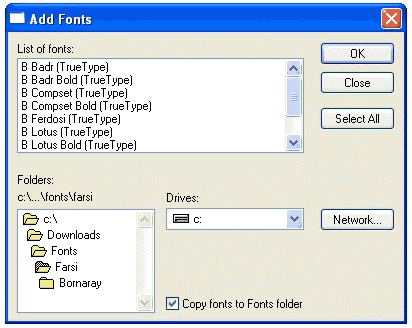
The Add Font dialogue box will open.

Add Fonts: In the small Folders: box located in the
bottom left-hand corner of the dialogue box, click on the
folder where your font is located. Make sure the Copy fonts
to Fonts folder is checked. To install all of the fonts in
the display, click the Select All button and then click OK.
To install select fonts from the list, hold the CTRL key
down and click on the fonts that you want to install. The
font names will darken. When you are finished selecting the
fonts, click on the OK button and the fonts will install in
the c:\windows\fonts folder.

|
Important Note: These notes are merely offered as a help to our
readers. The reader is solely responsible regarding the use and consequences
of using these
notes.
|
Last edited 02-21-2005
